This guide explains how to enable a FREE SSL certificate using Let’s Encrypt on a Windows Server running IIS. Specifically, it addresses the challenges of using wildcard certificates for multiple websites with different domains and subdomains.
Scenario:
You have a Windows Server 2019 with IIS 10, a single IP address, and multiple HTTPS websites hosted with different domain names. For subdomains under the same primary domain (like *.example.com), a wildcard certificate works perfectly. However, complications arise when adding websites from different domains, such as mydomain.com.
Initial Setup Example:
IIS 10 hosts the following sites:
- ABC Server (Website)
abc.api.example.com– HTTPS @ 443
- ABC Client (Website)
abc.example.com– HTTPS @ 443bcd.example.com– HTTPS @ 443cde.example.com– HTTPS @ 443admin.example.com– HTTPS @ 443
- XYZ App (Website)
xyz.example.com– HTTPS @ 443
- SEQ (Website)
seq.mydomain.com– HTTPS @ 443
Managing these SSL certificates with multiple domain names can be tricky, but Let’s Encrypt simplifies the process.
Steps to Enable Let’s Encrypt SSL on IIS
- Enable IIS and Create the
.well-knownFolder- Follow this guide to create the
.well-knowndirectory for SSL validation- Create a folder on the C drive named
well-known. Inside, create another folder calledpki-validation. Example:C:\well-known\pki-validation. - Place the required validation file in the
pki-validationfolder. - Open IIS Manager and for each site, right-click and select Add Virtual Directory.
- In the Alias field, enter
.well-known. In the Physical Path field, enter the path to the folder you created, e.g.,C:\well-known\pki-validation. - Confirm with OK. The folder and files should now be accessible via the web.
- Create a folder on the C drive named
- Follow this guide to create the
- Set Proper Permissions for the
C:\well-known\pki-validationFolder- Follow this IIS 403 Forbidden solution:
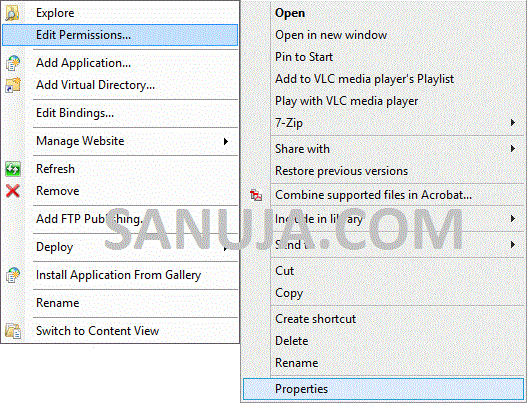
- Right-click the
.well-knownfolder and select Properties.
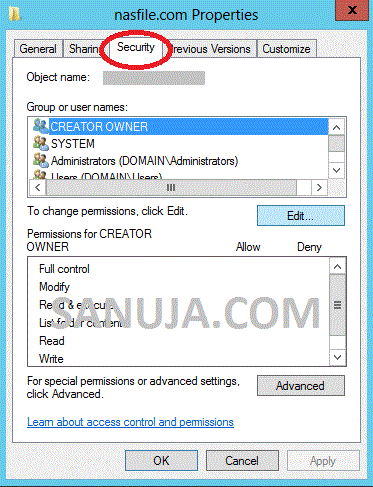
- Navigate to the Security tab.

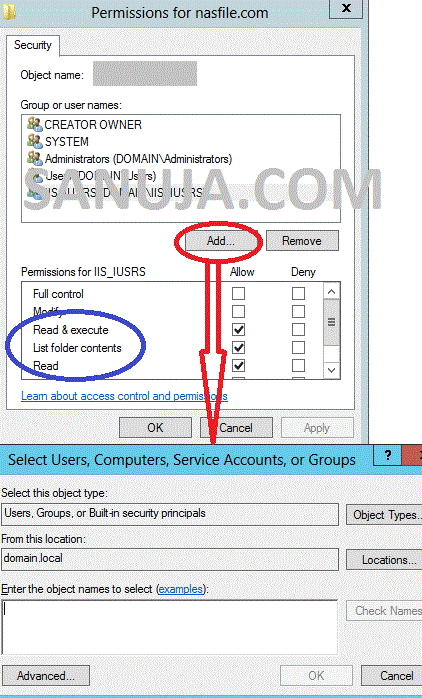
- Click Edit and ensure
IIS_IUSRSis listed. If not, click Add
- In the Enter the object names box, type
IIS_IUSRSand click OK. - Set Read & execute, List folder contents, and Read permissions for
IIS_IUSRS.
- Right-click the
- Follow this IIS 403 Forbidden solution:
- Validate DNS Entries for Each Domain/Subdomain
- Use a tool like Google Dig to validate DNS entries for the following domains:
- abc.api.example.com
- abc.example.com
- bcd.example.com
- cde.example.com
- admim.example.com
- xyz.example.com
- seq.mydomain.com
- Use a tool like Google Dig to validate DNS entries for the following domains:
- Download and Install win-acme
- Download win-acme from https://www.win-acme.com.
- After downloading, unblock the files and extract them to
C:\win-acme.
- Run win-acme to Generate SSL Certificates
- Navigate to
C:\win-acmeand runwin-acme.exeas Administrator. - Follow the prompts to select the appropriate site for which you want to generate the SSL certificate.
- Once complete, your sites will be secured with Let’s Encrypt SSL certificates.
- Navigate to
By following these steps, you can manage multiple websites with different domains and subdomains on a single IIS server with Let’s Encrypt SSL certificates, solving the issues typically associated with wildcard certificates for different domains.